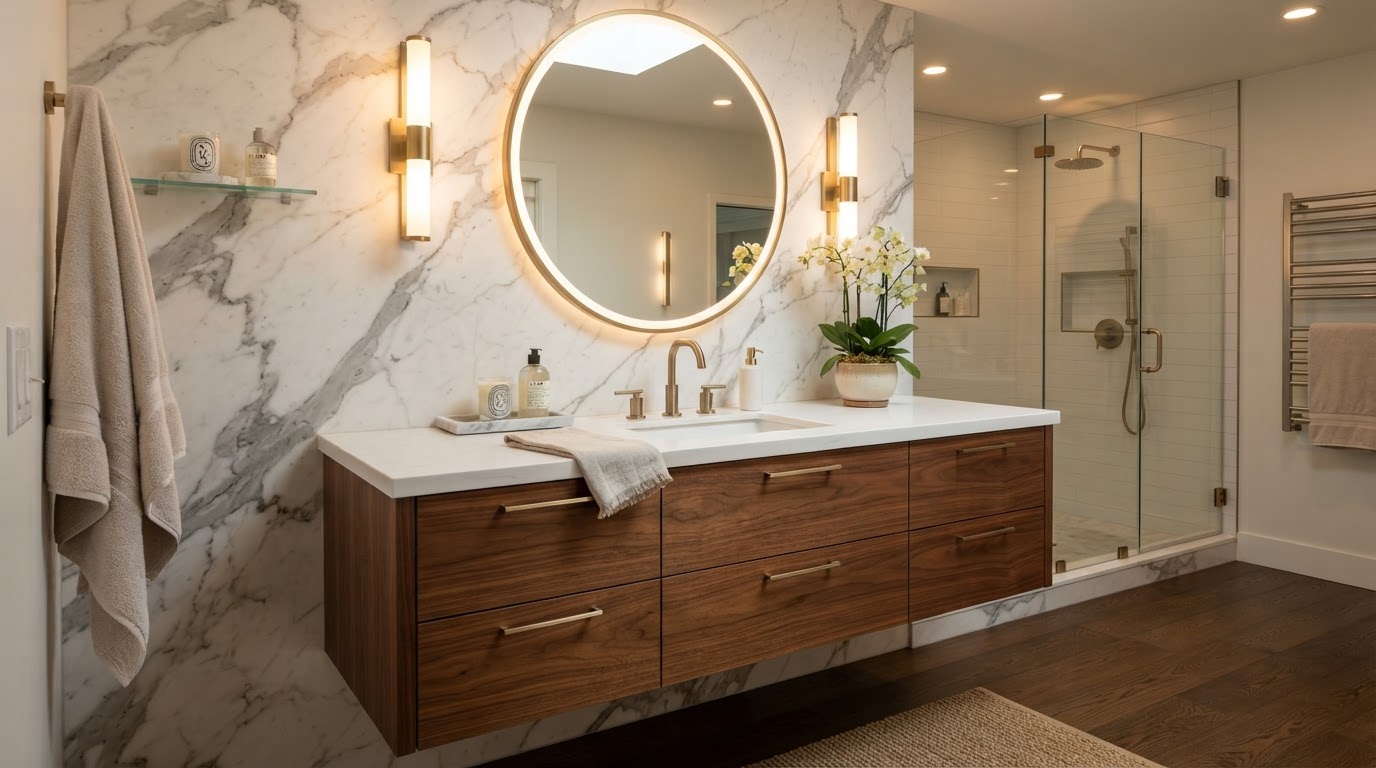
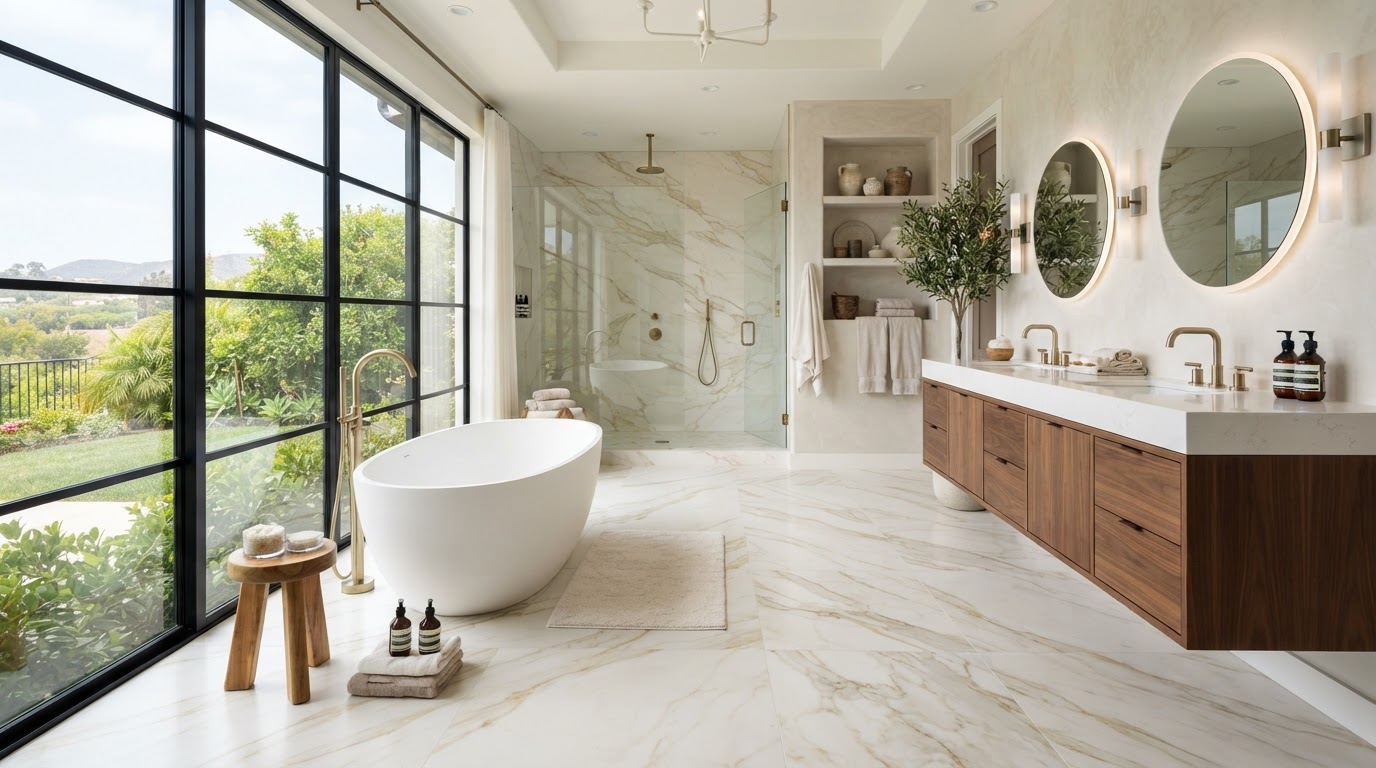
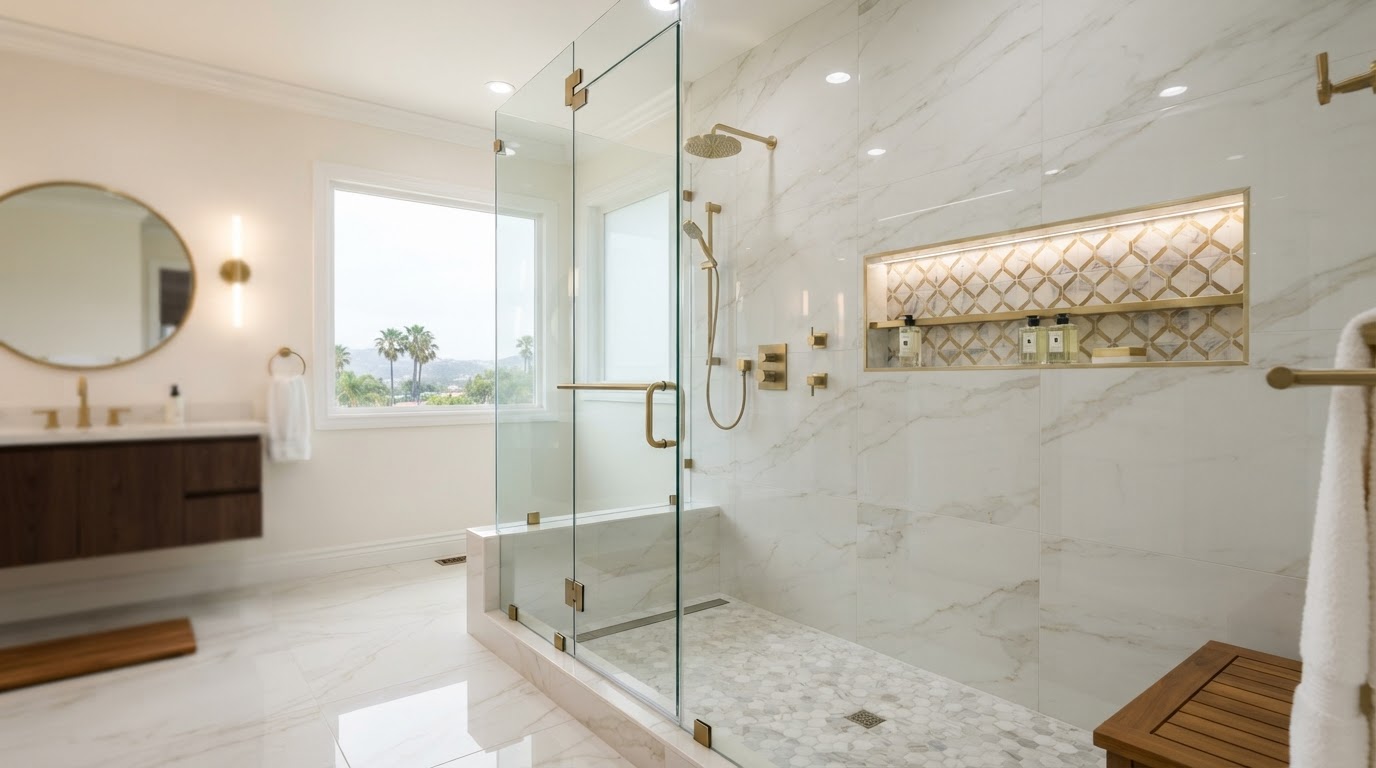
A beautiful bathroom can have expensive tile, a custom vanity, premium plumbing fixtures, and a stunning glass shower enclosure—and still develop serious problems if the waterproofing underneath those finishes was poorly designed or installed.
That's because tile and grout are not the waterproofing system. Water can move through grout joints, cracks, penetrations, transitions, and other parts of a shower assembly. Without an appropriate waterproofing and water-management strategy, that moisture can reach the materials behind the finished surfaces.
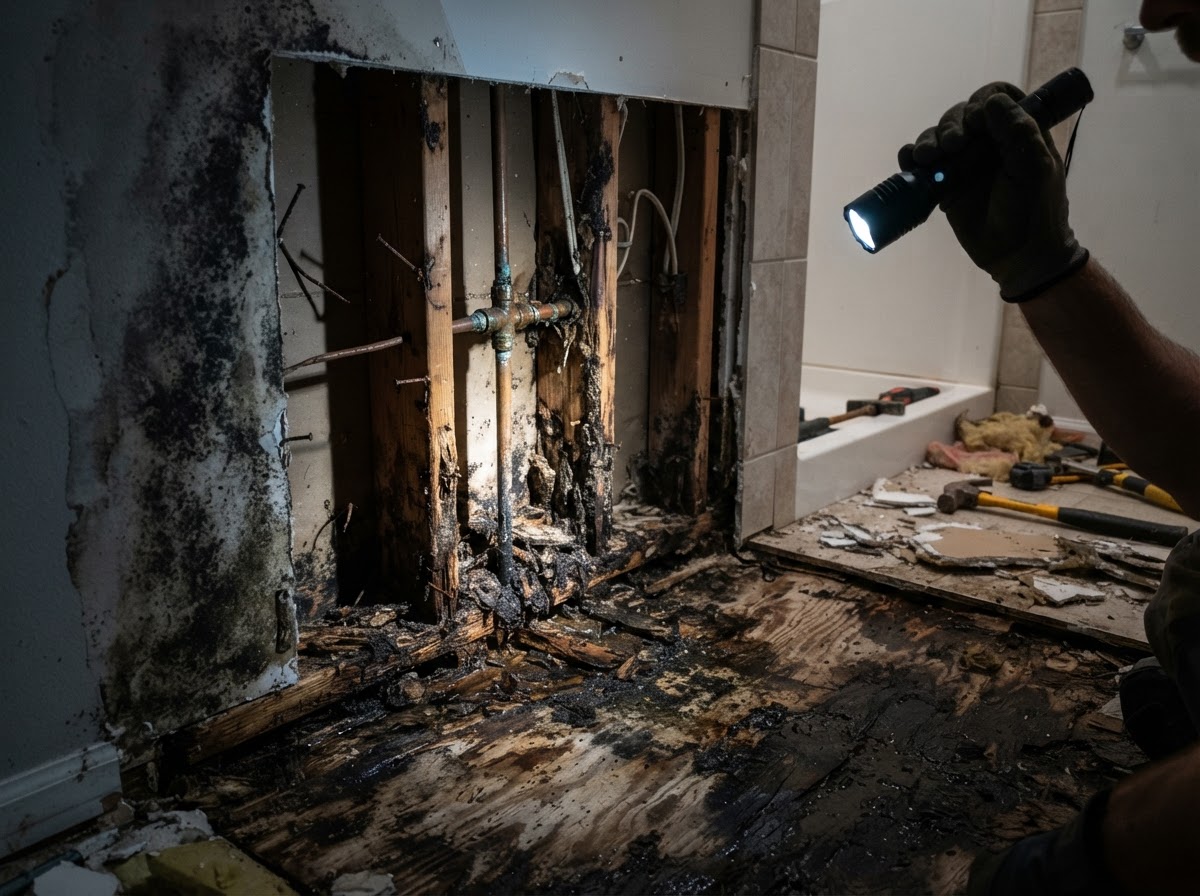
Over time, this can contribute to mold and mildew, rot, damaged framing, deteriorated subfloors, swollen drywall or cabinetry, musty odors, efflorescence, loose or damaged tile, ceiling stains in rooms below, and expensive repairs. Industry guidance for tiled showers emphasizes that tile and grout should be installed as part of a properly designed moisture-management system rather than treated as the waterproofing itself.
For homeowners planning a bathroom remodel in Orange County or Los Angeles, waterproofing should therefore be considered one of the most important parts of the project—not an optional upgrade. This guide explains what bathroom waterproofing actually does, where it is needed, how shower waterproofing systems work, common mistakes to watch for, and what homeowners should ask their remodeling contractor before construction begins.
What Is Bathroom Waterproofing?
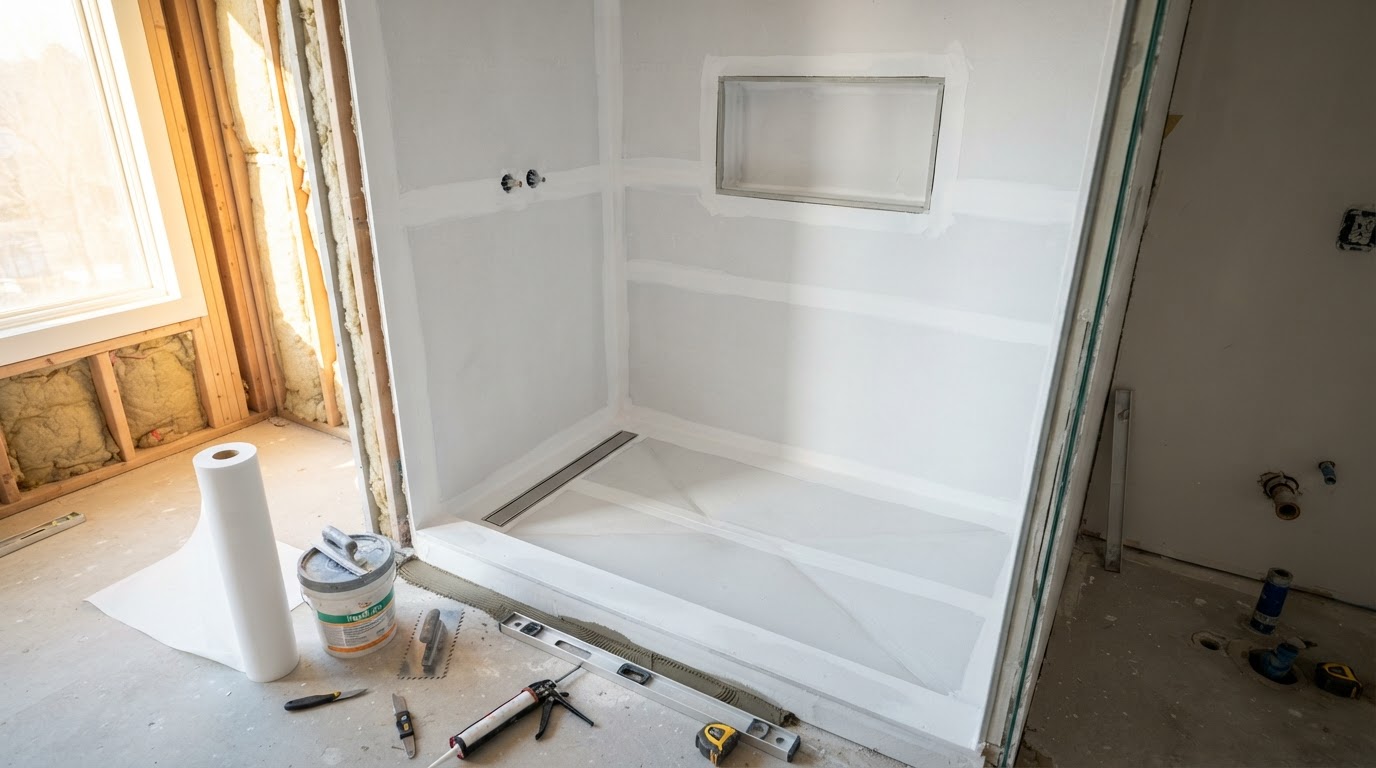
Bathroom waterproofing is the process of creating a protective system that prevents water from reaching moisture-sensitive building materials and structural components. Depending on the bathroom design, waterproofing may involve waterproof membranes, a shower pan or shower base system, sloped shower floors, properly integrated drains, waterproofed wall assemblies, sealed corners and seams, waterproofed niches, waterproofed benches, proper treatment around plumbing penetrations, tub surround waterproofing, proper transitions between wet and dry areas, and appropriate treatment around windows or other openings.
The exact system depends on the construction method, materials, shower configuration, applicable requirements, and the manufacturer's installation instructions. The key concept is simple: the tile is the finished surface, and the waterproofing system protects what's behind it. A properly designed shower should manage water before that water can reach moisture-sensitive framing, sheathing, subfloors, and wall cavities.
Is Bathroom Tile Waterproof?
No. This is one of the most important things homeowners should understand before remodeling a bathroom. Ceramic and porcelain tile are excellent materials for bathrooms because they are durable, attractive, and available in an enormous range of colors, sizes, textures, and patterns. But tile should not be treated as the waterproofing layer. The same applies to grout—even sealed grout does not eliminate the need for an appropriate waterproofing system beneath a tiled shower.
This distinction is particularly important when designing walk-in showers, curbless showers, large-format tile showers, shower niches, shower benches, tub surrounds, steam showers, and wet rooms. The visible tile may be the part homeowners notice, but the waterproofing system is one of the components that determines whether the finished shower performs properly over time.
Waterproofing vs. Water-Resistant Materials
These terms are sometimes used interchangeably, but they are not the same.
Water-Resistant
A water-resistant material can tolerate exposure to moisture without immediately failing. However, it may still absorb or allow some moisture to pass through.
Waterproof
A waterproofing layer or assembly is designed to prevent liquid water from passing through it when properly installed for its intended application.
Why the Difference Matters
Some common shower materials are described as water-resistant but are not themselves the complete waterproofing solution. For example, a tile backer material may provide a suitable substrate for tile while still requiring a separate waterproofing strategy. The important question isn't simply "Did you use cement board?" The better question is: "What is the complete waterproofing assembly, and how are all of its components connected?" That includes the floor, walls, corners, drain, penetrations, niches, benches, curbs, and transitions.
Where Does a Bathroom Need Waterproofing?
Not every square inch of a bathroom necessarily requires the same waterproofing treatment. The highest-priority areas are those exposed to significant or repeated water.
1. Shower Walls
Continuously exposed to water during normal use. The waterproofing strategy should protect the wall assembly behind the tile, especially around shower controls, showerheads, hand showers, body sprays, niches, corners, bench areas, and tub-to-wall transitions.
2. Shower Floor
One of the most demanding areas in the bathroom. Water is intentionally directed toward the drain, meaning the floor must be designed to manage water effectively with appropriate slope, a compatible waterproofing system, proper drain integration, and proper wall-to-floor transitions.
3. Shower Niches
Extremely popular for built-in storage, but they introduce additional corners, horizontal surfaces, vertical transitions, and changes in plane. Every one of these details needs to be incorporated into the waterproofing strategy.
4. Shower Benches
An excellent feature for comfort, accessibility, and aging-in-place, but they create additional horizontal surfaces where water can collect. The bench should function as part of the shower's overall waterproofing assembly.
5. Shower Curbs
A common trouble spot. The curb crosses the waterproofing system and is frequently exposed to standing water, splashing, and foot traffic. Fasteners that improperly penetrate the waterproofing layer can create leak paths.
6. Tub Surrounds
A bathtub may look less complicated than a walk-in shower, but the walls around a tub can still receive significant water. If a bathtub is used as a shower, the surrounding walls should be treated as a wet area.
7. Bathroom Floors
Outside the shower is a different situation. Not every bathroom floor requires the same assembly as a shower, but additional moisture protection can be beneficial where the substrate is vulnerable or the consequences of a plumbing leak could be significant.
Why Shower Slope Matters
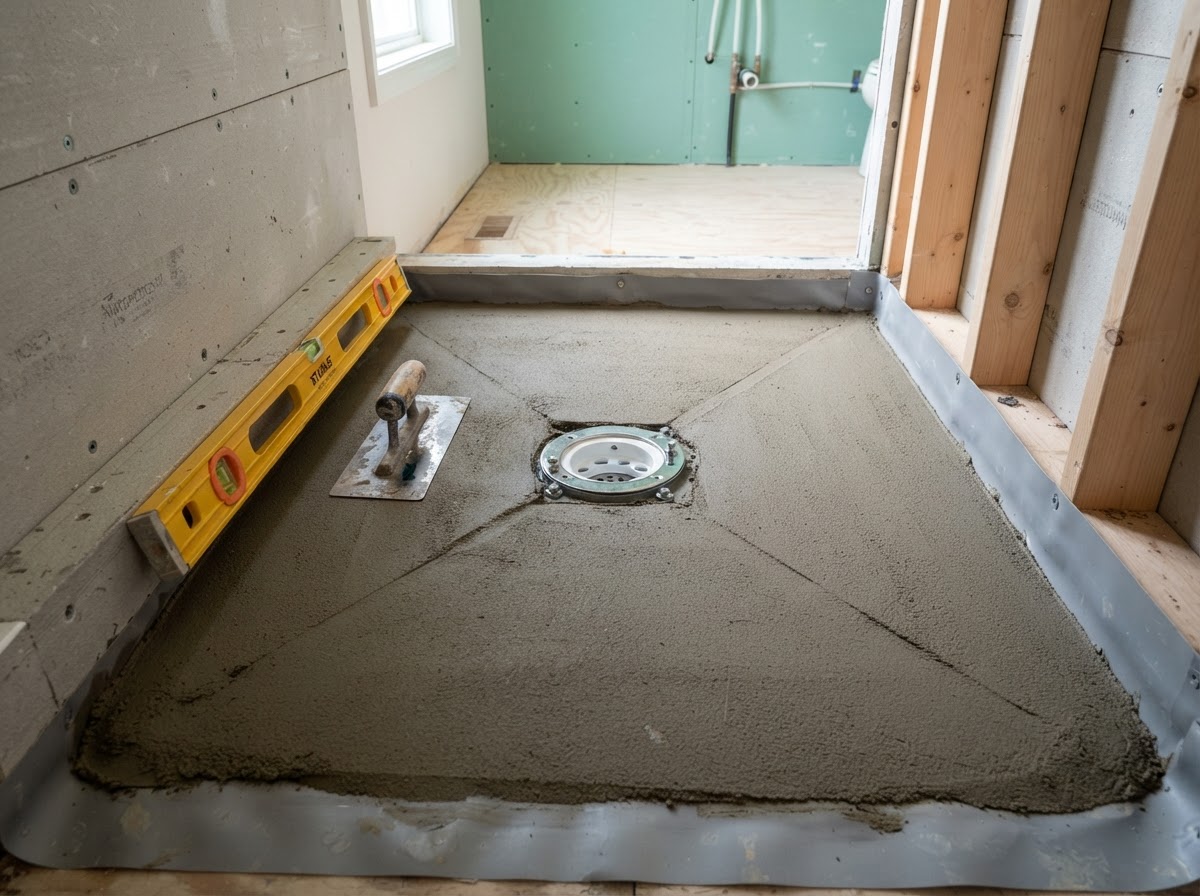
Water needs somewhere to go. A shower floor should be constructed so water flows toward the drain rather than collecting in low spots. The exact slope and construction requirements depend on the shower system and applicable standards, but the basic principle is straightforward: the finished shower floor should direct water toward the drain.
Poor slope can contribute to standing water, persistent moisture, discoloration, mold growth, mineral deposits, grout deterioration, and slower drying. In traditional shower assemblies, the underlying waterproofing and drainage components also need to work together. For example, traditional pan-liner systems rely on properly sloped substrates and functional drain weep systems.
A beautiful shower floor doesn't compensate for poor drainage or waterproofing.
The Main Types of Bathroom Waterproofing Systems
There isn't one single waterproofing method appropriate for every bathroom. Two broad approaches are commonly used for tiled showers: traditional shower assemblies and bonded waterproofing assemblies. Both can be designed correctly when installed according to the applicable method and requirements.
Traditional Shower Waterproofing
Traditional shower construction is sometimes described as a "water-in, water-out" system. Water can enter the tiled surface and mortar bed, but the waterproofing system underneath is designed to collect and direct that moisture toward the drain. A traditional shower may include a sloped substrate, shower pan liner, clamping drain, mortar bed, tile, grout, and waterproof or moisture-management treatment behind wall surfaces.
One critical detail is the slope beneath the pan liner. If a pan liner is installed over a flat substrate rather than a properly sloped base, water that reaches the liner may not drain correctly toward the weep holes, leaving portions of the shower assembly continuously saturated. Another major concern is improper penetration of the pan liner—fasteners placed through a waterproofing liner in the wrong location can create a pathway for water to escape.
Bonded Waterproofing Systems
Instead of allowing moisture to move into a mortar bed before reaching the waterproofing layer, a bonded membrane is installed closer to the surface. These systems may use sheet-applied membranes, liquid-applied membranes, waterproof building panels, waterproofing strips, preformed corners, specialized seals, and compatible drain assemblies.
Bonded waterproof membranes have performance criteria established by ANSI A118.10. The advantage of this approach is that the waterproofing layer can form a more continuous envelope immediately beneath the tile assembly. However, the quality of the installation still depends on proper detailing. A membrane isn't automatically successful simply because it was purchased and installed—the seams, corners, penetrations, transitions, and drain connection all matter.
Sheet Membrane vs. Liquid-Applied Waterproofing
Homeowners may encounter several different waterproofing products during a bathroom remodel.
Sheet Membranes
Sheet membranes arrive as manufactured sheets that are installed over the appropriate substrate. Advantages can include consistent manufactured thickness, clearly defined installation procedures, preformed corners and seals in some systems, and fast installation when properly planned.
However, seams and transitions must be installed correctly.
Liquid-Applied Membranes
Liquid waterproofing products are applied directly to the appropriate substrate and cured to form a waterproof layer. Potential advantages include the ability to conform to complex shapes, convenient application around certain details, and seamless application when properly installed.
But application thickness, curing, coverage, reinforcing, and detailing matter. The installer must follow the specific manufacturer's requirements.
Waterproofing Is Only as Good as Its Details
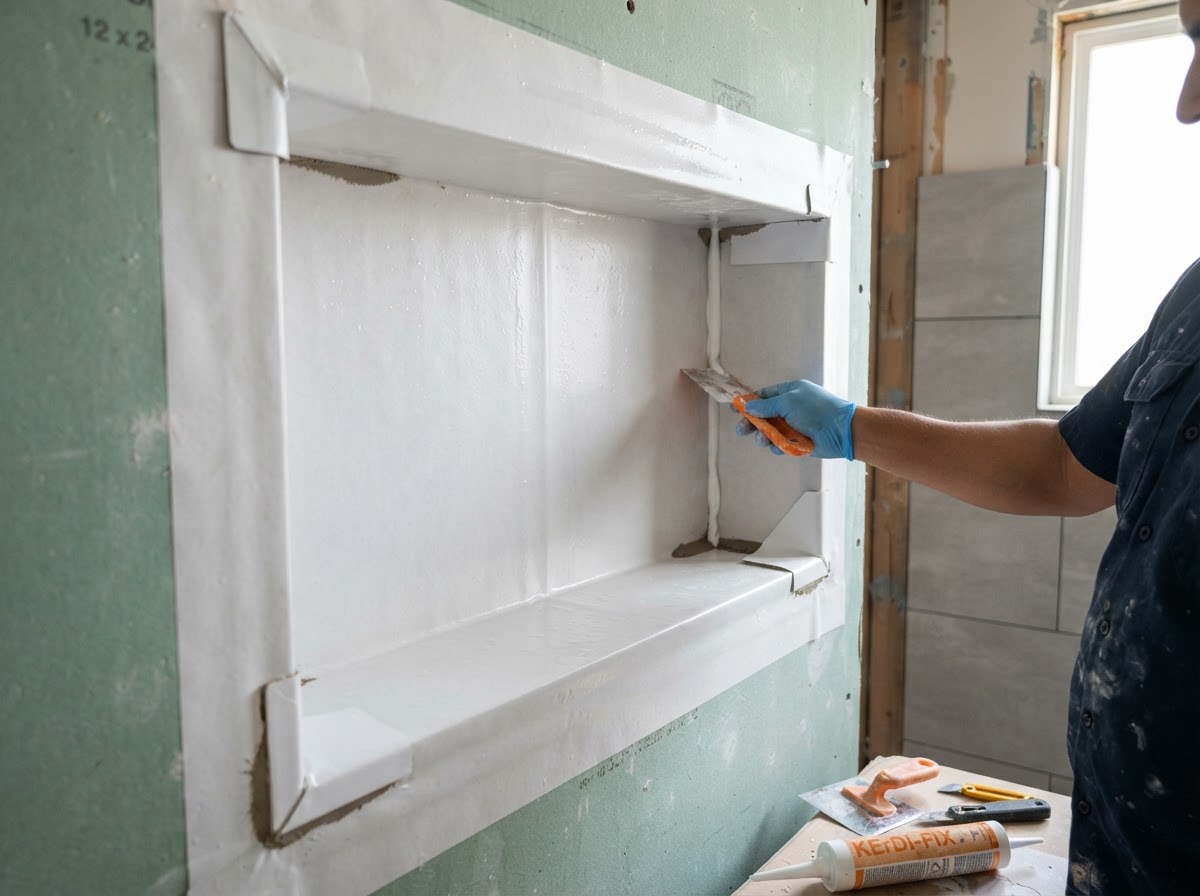
One of the biggest misconceptions about bathroom waterproofing is that the membrane itself is the difficult part. In reality, many failures occur at transitions and penetrations. Consider everything that passes through or changes direction in a shower: corners, wall-to-floor transitions, the shower valve, shower arm, tub spout, niche, bench, curb, drain, door threshold, plumbing penetrations, and window openings.
Every transition needs to be addressed. A waterproofing system must behave like a continuous assembly, not a collection of disconnected waterproof materials.
The Shower Drain Is a Critical Part of Waterproofing
The drain isn't simply where water disappears. It is one of the most important connection points in the entire shower assembly. The waterproofing system must integrate correctly with the drain. Different shower construction methods use different drain assemblies—traditional pan-liner systems typically connect the liner to a clamping drain, while bonded waterproofing systems can use drains designed to integrate directly with the waterproofing membrane. The important principle is: the waterproofing layer and drain must work together as one water-management system.
Point Drain
A traditional point drain sits at a specific location on the shower floor. The surrounding floor generally needs to slope toward that point. This can affect tile selection because the floor requires multiple changes in slope. Smaller mosaic tiles are often easier to accommodate on these multi-plane surfaces.
Linear Drain
A linear drain is typically positioned along one side of the shower, allowing the floor to slope primarily in one direction. One design advantage is that it can make larger-format shower floor tile easier to use. However, they are not automatically a better choice for every bathroom—drain location, waterproofing method, floor elevation, framing, plumbing, and design all need to be considered together.
Waterproofing a Curbless Shower
Curbless showers are popular in contemporary bathroom design because they create a cleaner transition between the bathroom floor and shower, and they can also improve accessibility. But eliminating the curb does not eliminate the need for waterproofing. In fact, a curbless shower requires careful coordination of shower floor slope, drain location, finished floor elevation, waterproofing, shower entry, adjacent flooring, and door or glass configuration. The waterproofing strategy must account for the transition between the shower and the surrounding bathroom. This is one reason curbless showers should be designed before construction begins rather than improvised during installation.
What About Steam Showers?
Steam showers require additional consideration because the issue isn't only liquid water—water also exists as vapor. A conventional shower and a steam shower therefore shouldn't automatically be treated as identical waterproofing applications. Steam environments can require additional attention to vapor management and the compatibility of the entire wall and ceiling assembly. Industry guidance notes that water vapor can contribute to moisture problems inside wall cavities when steam shower assemblies are not properly designed. If you're considering a steam shower, tell your designer or contractor before construction begins so the waterproofing and vapor-management strategy can be designed specifically for the application.
Common Bathroom Waterproofing Mistakes
Many bathroom leaks aren't caused by one dramatic mistake. They can result from small problems accumulating throughout the assembly. Here are some of the most common issues homeowners should understand.
Signs Your Bathroom May Have a Waterproofing Problem
Some leaks are obvious. Others can remain hidden for months or years. Watch for these warning signs.
These symptoms should be investigated rather than simply covered up.
Does Mold Always Mean the Waterproofing Failed?
No. Mold can result from several moisture-related conditions: poor ventilation, persistent condensation, plumbing leaks, surface water, hidden water intrusion, excess humidity, improper drying, or building-envelope problems. A bathroom with poor ventilation can develop mold even if the shower waterproofing system is functioning properly. That's why moisture management should be viewed more broadly than waterproofing alone. A successful bathroom should address water + humidity + ventilation + drainage + waterproofing.
Bathroom Ventilation Is Part of Moisture Management
Waterproofing protects the structure from liquid water intrusion. Ventilation helps control humidity. Both matter. Bathrooms generate significant moisture from showers, baths, hot water, wet towels, steam, and normal occupancy. Persistent humidity can contribute to condensation, mold, peeling paint, deteriorated finishes, musty odors, and moisture damage. A bathroom remodel is therefore a good opportunity to evaluate the exhaust fan and overall ventilation strategy.
How Bathroom Waterproofing Should Fit Into a Remodel
Waterproofing should be planned before finished materials are installed. A typical bathroom remodeling sequence may look something like this:
Inspect the current bathroom for water damage, plumbing issues, structural problems, existing waterproofing, subfloor condition, and previous remodeling work.
Determine shower size, drain location, vanity location, tub configuration, toilet location, niche, bench, curbless or curbed shower, and glass enclosure.
The waterproofing system must work with the plumbing layout—including shower valves, showerheads, drains, tub fixtures, supply lines, and other penetrations.
The substrate must be appropriate for the waterproofing and tile assembly. Any damaged or unsuitable material should be addressed before waterproofing begins.
The selected waterproofing system is installed according to its approved installation method. This is where corners, seams, penetrations, niches, benches, curbs, and transitions receive careful attention.
The waterproofing layer must connect properly to the drain assembly.
Depending on the system and local requirements, inspections or testing may be required before the assembly is covered. This stage is important because once tile is installed, much of the waterproofing becomes invisible.
Only after the underlying assembly is appropriately prepared should the finished tile installation proceed.
The shower enclosure, plumbing fixtures, vanity, lighting, mirrors, and other finishes are installed.
The completed bathroom should be reviewed for water flow, drainage, fixture operation, grout, caulking, glass, tile, plumbing, ventilation, and finish quality.
How Much Does Bathroom Waterproofing Cost?
There isn't one universal price for bathroom waterproofing. That's because waterproofing is usually part of a larger construction system rather than a standalone product. The cost can depend on bathroom size, shower size, waterproofing method, shower pan or base, drain type, curbless design, niches, benches, number of corners, tile format, substrate condition, plumbing changes, existing water damage, labor, material selection, and local construction requirements.
A simple shower with straightforward geometry will generally require less work than a large custom shower with a bench, niche, multiple shower heads, curbless entry, linear drain, and complex tile layout. The biggest mistake is comparing waterproofing systems solely by the price of the membrane. The real comparison should include materials + labor + preparation + detailing + drain integration + testing + overall system. A less expensive material does not necessarily produce a less expensive project if it requires more labor or creates scheduling complications.
What Happens If Water Damage Is Found During a Bathroom Remodel?
This is an important question to ask before demolition. Older bathrooms can hide problems behind tile, drywall, vanities, flooring, tub surrounds, and shower walls. Demolition may reveal rotted framing, damaged subfloor, mold, improper previous waterproofing, old plumbing, structural deterioration, unpermitted work, or water intrusion. This is why a responsible remodeling budget should not assume that every hidden condition is perfect. Venguard's bathroom planning guidance similarly emphasizes evaluating existing conditions before construction and accounting for possible hidden issues such as water damage, damaged framing, subfloor problems, outdated plumbing, and improper previous renovations.
How to Prevent Bathroom Water Damage During a Remodel
The best time to prevent a waterproofing problem is before the tile is installed. Use this checklist.
Before Construction
- Evaluate existing water damage
- Confirm shower configuration
- Determine drain location
- Choose waterproofing strategy
- Coordinate plumbing
- Confirm substrate requirements
- Plan niches and benches
- Determine curbless vs. curbed
- Plan ventilation
- Confirm permits & inspections
During Waterproofing
- Prepare substrate correctly
- Install system per requirements
- Treat corners
- Treat seams
- Seal penetrations
- Waterproof niches
- Waterproof benches
- Properly treat curbs
- Integrate drain
- Maintain proper slope
- Complete required testing
Before Tile
- Confirm waterproofing complete
- Verify transitions
- Verify drain connection
- Confirm penetrations
- Confirm slope
- Address deficiencies before covering
Questions to Ask Your Bathroom Remodeling Contractor
Before hiring a contractor, don't just ask "How much does the bathroom remodel cost?" Ask about what is behind the tile. Here are better questions.
Ask for the specific method and system rather than accepting a vague answer such as 'we'll waterproof it.'
Ask whether it covers shower walls, shower floor, niches, benches, curbs, transitions, and penetrations.
This is one of the most important details in the shower.
The contractor should be able to explain how water will reach the drain.
These areas deserve specific attention.
Ask about shower valves, showerheads, body sprays, and other penetrations.
Understand the process for documenting and approving unforeseen work.
Requirements vary by jurisdiction and project scope.
You should know which trade is performing this work and who is responsible for its quality.
Ask what documentation is provided for the products and workmanship.
Bathroom Waterproofing in Orange County & Los Angeles
Orange County homes range from older properties requiring extensive renovation to newer homes where homeowners want a more customized bathroom. Waterproofing decisions should therefore be based on the actual existing conditions of the property. For homeowners in areas such as Irvine, Newport Beach, Costa Mesa, Huntington Beach, Anaheim, Santa Ana, Laguna Beach, Mission Viejo, Tustin, and Lake Forest, the appropriate bathroom waterproofing strategy will depend on the home's construction, project scope, bathroom layout, materials, and local requirements.
Los Angeles bathroom remodeling projects can vary significantly based on the age, construction type, and existing condition of the property. Older bathrooms may reveal previous water damage, outdated plumbing, improper shower construction, deteriorated substrates, or multiple layers of previous renovations. Local permitting and inspection requirements can also vary depending on the jurisdiction and scope of work. For that reason, homeowners should evaluate waterproofing as part of the overall remodeling plan rather than treating it as a separate tile-installation decision.
Venguard Construction serves homeowners throughout Orange County and surrounding Southern California communities and incorporates waterproofing into its broader bathroom remodeling and design-build planning process.
How Venguard Approaches Bathroom Waterproofing
A bathroom remodel should not be viewed as a collection of independent tasks. The shower design affects the waterproofing. The waterproofing affects the tile installation. The drain affects the floor design. The plumbing affects the wall layout. The niche affects the waterproofing details. The glass enclosure affects the finished dimensions. Everything connects.
Venguard Construction's design-build process begins with consultation, site walkthrough, measurements and discovery, followed by estimating, design, material selection, planning and permitting, construction, project management, and final walkthrough. That integrated process is particularly valuable for bathrooms because many waterproofing decisions need to be made before the finished surfaces are installed.
The Most Important Lesson About Bathroom Waterproofing
You probably won't notice good waterproofing when you walk into a finished bathroom. That's the point. You notice the tile. You notice the vanity. You notice the lighting. You notice the glass shower. But you don't see the membrane behind the tile, the drain connection underneath the shower floor, the treatment around the niche, or the waterproofing at the corners. Yet those hidden components can have a major impact on the long-term performance of the bathroom.
A beautiful bathroom should therefore be more than beautiful. It should be designed well, built correctly, properly waterproofed, easy to maintain, and designed for the way you actually live.
Bathroom Waterproofing FAQ
Is bathroom tile waterproof?
No. Tile and grout should not be treated as the waterproofing system. A properly designed wet area requires an appropriate moisture-management and waterproofing strategy beneath or behind the finished tile.
Do I need waterproofing behind shower tile?
Yes, the shower assembly should incorporate an appropriate waterproofing strategy to protect moisture-sensitive materials behind the finished surfaces. The exact system depends on the construction method, materials, and applicable requirements.
Does cement board waterproof a shower?
Not necessarily. Some cement-based backer materials are water-resistant but are not themselves a complete waterproofing system. The complete wall assembly needs to be designed for moisture management.
Is grout waterproof?
No. Even sealed grout should not be relied upon as the primary waterproofing layer.
Does a shower niche need waterproofing?
Yes. A shower niche is part of the wet area and should be incorporated into the shower's waterproofing system.
Does a shower bench need waterproofing?
Yes. A built-in shower bench should be properly waterproofed and designed to manage water.
Is a curbless shower harder to waterproof?
It can require more careful coordination because the shower floor, drain, finished floor elevation, entry transition, and waterproofing must work together.
Are linear drains better than regular shower drains?
Not necessarily. Linear drains can offer design and installation advantages for certain shower layouts, including allowing a single-plane slope that can accommodate larger-format tile. But the best drain depends on the shower design, plumbing, waterproofing system, and homeowner's priorities.
How long does bathroom waterproofing last?
A properly designed and installed waterproofing assembly can provide long-term protection, but longevity depends on the system, installation quality, substrate, building movement, maintenance, and other conditions. No waterproofing product should be considered a substitute for correct design and installation.
Can you waterproof over existing bathroom tile?
Sometimes, but it depends entirely on the existing assembly and the proposed renovation. If the existing shower has a questionable waterproofing system, simply installing new tile over the old surface may not address the underlying problem. A professional evaluation is recommended before deciding.
How do I know if my shower is leaking behind the tile?
Possible signs include musty odors, stained walls, damaged drywall, loose tile, persistent moisture, swollen trim, soft flooring, ceiling damage below, and mold growth. However, some leaks remain hidden without visible symptoms.
Does waterproofing prevent mold?
Proper waterproofing can help prevent moisture from reaching moisture-sensitive materials where hidden mold growth can occur. However, waterproofing is only one part of moisture management. Ventilation, plumbing, drainage, humidity control, and proper construction also matter.
How much does shower waterproofing cost?
There is no universal price because waterproofing is part of a larger shower assembly. Cost depends on shower size, waterproofing method, substrate condition, drain, layout, niches, benches, curbs, labor, materials, and other project requirements.
Should I waterproof the entire bathroom floor?
Not necessarily. The appropriate treatment depends on the bathroom layout, substrate, construction, and risk of water exposure. Showers and tub surrounds generally require more specialized waterproofing than ordinary dry-area bathroom floors.
Is waterproofing included in a bathroom remodeling project?
It should be clearly identified in the project scope. Before signing a remodeling agreement, ask exactly what waterproofing work is included and what system will be used.
Bathroom Waterproofing Checklist for Homeowners
Design
- • Shower layout finalized
- • Drain location finalized
- • Shower floor type selected
- • Curbless vs. curbed decided
- • Niche location planned
- • Bench location planned
- • Shower fixtures coordinated
- • Tile dimensions considered
Waterproofing
- • Waterproofing system selected
- • Shower walls addressed
- • Shower floor addressed
- • Corners addressed
- • Seams addressed
- • Niches addressed
- • Bench addressed
- • Curb addressed
- • Plumbing penetrations addressed
- • Drain connection addressed
- • Transitions addressed
Construction
- • Existing water damage evaluated
- • Substrate prepared
- • Plumbing completed
- • Waterproofing installed
- • Required testing/inspection completed
- • Waterproofing approved before tile
- • Tile installed
- • Grout and sealants completed
- • Fixtures installed
- • Shower tested
Related Bathroom Remodeling Resources
Final Thoughts: Don't Let Beautiful Tile Hide a Bad Bathroom
When homeowners remodel a bathroom, it's natural to focus on what they can see—the tile, the vanity, the countertop, the lighting, the fixtures, the glass. But some of the most important decisions happen underneath all of those finishes. A properly planned bathroom waterproofing system protects the areas you won't see after construction is complete. That's why waterproofing should be discussed before demolition—not after a leak appears.
If you're planning a bathroom remodel in Orange County, Los Angeles, or surrounding Southern California communities, start by evaluating the existing bathroom, defining the desired layout, and understanding how the shower will manage water from the finished surface down to the drain. Venguard Construction approaches bathroom remodeling as an integrated design-build process, coordinating planning, design, materials, construction, project management, and final completion rather than treating each component as an isolated task.
Book Venguard Construction
If you're ready to discuss your bathroom project, Venguard offers a complimentary consultation and describes its team as licensed and insured, with a stated response goal of within 24 hours. Build a bathroom where the waterproofing is designed as carefully as the tile you see.
Schedule a Complimentary Bathroom Remodeling Consultation